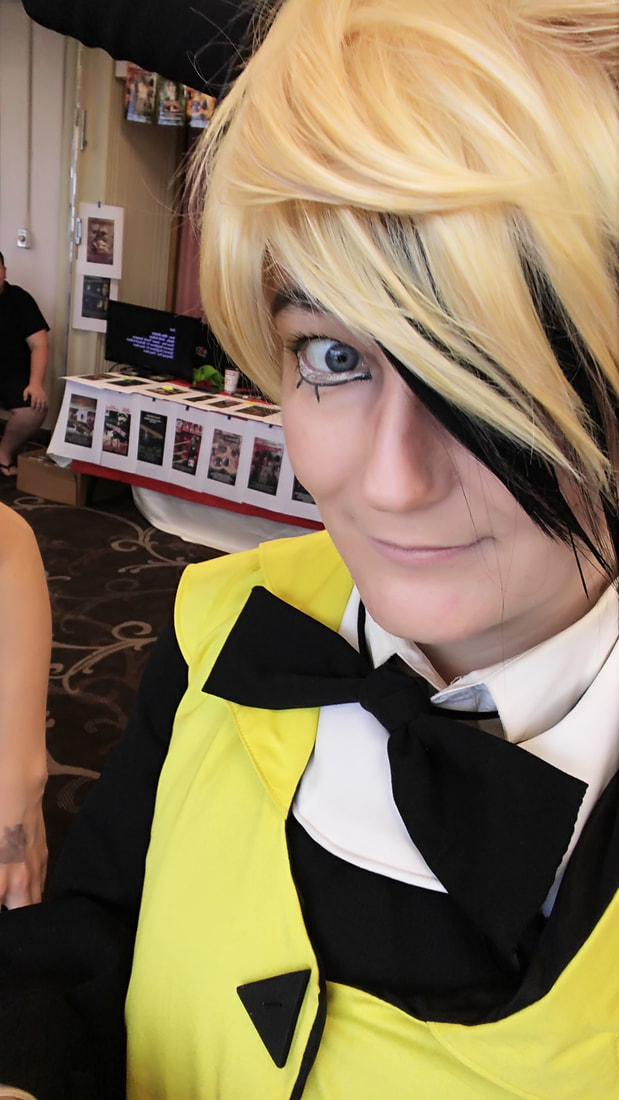
Bill Cipher - Disney's Gravity Falls

Worn to:
Quinte Horror Expo 2017 (Belleville, ON)
Quinte Halloween Cosplay Day/Photoshoot IX (Belleville, ON)
GAnime 2018 (Gatineau, QC)
International Fan Festival Toronto 2019 (Toronto, ON)
Filming Session 2020
Filming Session 2021
Status: Hiatus for Hat Upgrade
Why Bill Cipher?
I love the character of Bill, he's really quite dark and twisted for a character from a Disney cartoon show! One of my favourite aspects regarding a Bill cosplay is that since he's a triangle with an eye, arms, legs, a hat and bow tie, it leaves some freedom of interpretation to do him however you please.
Wig: Kyle in Fairy Blonde with Classic Short Wefts in Black. I ordered these from Arda Wigs (US). I followed the tutorial posted on their YouTube for sewing in the wefts at the front of my wig and using a can of Got2B Glued and a hair dryer proceeded to style the wig. I wanted to use the hair to cover up my eye so I didn't have to make an eyepatch. I went on to spike the wig and make the rest go backwards. There is also some minor darkening in under spots with black Sharpie (which I may add to in the future).
Hat: The construction shape is made using anti-slip shelf liner which is a kind of sticky EVA foam. It worked really well and it's hot glued together. To finish it I used some scrap black fabric and hot glued it on carefully, covering some final edges with black bias tape. It secures to the wig with a barrette that's hot glued on the bottom.
Coat: Yellow cotton sateen, black cotton & black lining. I made my own pattern for the coat. I sewed the entirety of the yellow together before getting to the details, including the shoulder points. Before putting in the lining and sleeves (used a commercial pattern for the sleeves), I did the brickwork on the bottom of the back. I measured out the distance for each brick and used a yardstick to get them all even. I drew them out in pen first to make sure I would get them right. I did the vertical ribbons first, and did the horizontal after they were all finished. There's tiny stitches along each side of the ribbons. Once all the ribbons were done I put the lining in. The collar is also a custom pattern. Since I couldn't find triangle buttons, I made them with the help of my mom. She cut them out on the scroll saw out of plywood and I painted them and sewed them on. The coat closes with snap fasteners due to the button hole issues I was having.
Vest: Left over cotton from an old project and Katherine soft touch (bought in 2011). I used an old vest pattern that I had bought at Value Village a few years ago and modified the front and added my own collar. The edges are all finished with bias tape. Like the coat the vest closes with snap fasteners and the buttons are sewn on. This was designed to be double breasted.
Bow tie: I used the same cotton as the vest. I sewed a rectangular strip and turned it the right way out, and hand sewed the one end closed. I ironed it and then tied it into the "bow". It's on an elastic that loops around my neck to make it easier.
My dress shirt and pants, gloves and shoes are from my closet.
Photography:
Horror Expo: Myself
GAnime shoot: Soulfool Paraiso